Many printer users want to know the answer to the question of how to view the printer history. This allows you to track which file was printed on your device and when. In this way, you can set up a kind of print control, which can be very useful.
Both Mac and Windows computers have options to check the printing history. Mac users can see completed print jobs through the standard print queue window.
You may also like: How to Manage Safari Power Saver Tool
Getting your print history on Windows 10 requires some configuration because the operating system doesn’t save any information about finished jobs by default, and the change only applies to future print jobs. You can also use certain websites and printer utilities to track your print history or printer usage.
Checking Printer History on Mac
Mac OS X keeps a log of all print jobs that run on your computer. Using the path below, you can view the history you need.
Perhaps you need to find out if someone has used the printer while you were away, or to find out the number of failed print attempts. Either way, our recommendations will allow you to see your printing history.
Method 1: Web Interface
In order for this to work, you must have enabled the Web Interface on your machine. To do that, simply follow these steps:
Step 1: Enabling the Web Interface
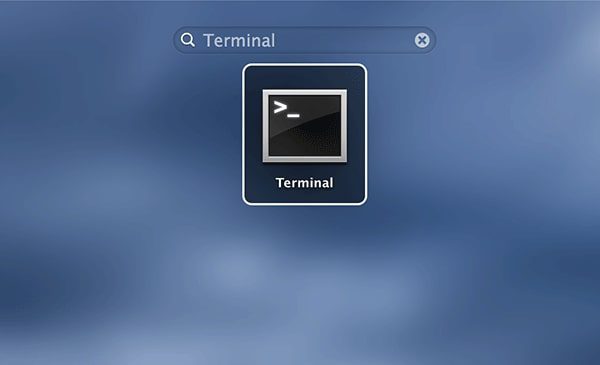
- Click on Launchpad in your dock and search for and click on Terminal. It will launch the Terminal app for you. You can also press the Command button and the space bar, simultaneously (this will open a search bar on your screen). Then Type Terminal (as you type, it should auto-fill). Double click Terminal in the left sidebar to open your Mac’s Terminal.
- When the app launches, type in the following command and press Enter: cupsctl WebInterface=yes. It tells the Terminal app to enable the web interface on your machine.
You may also like: How to Install Private Channels On Fire Stick (Complete guide)
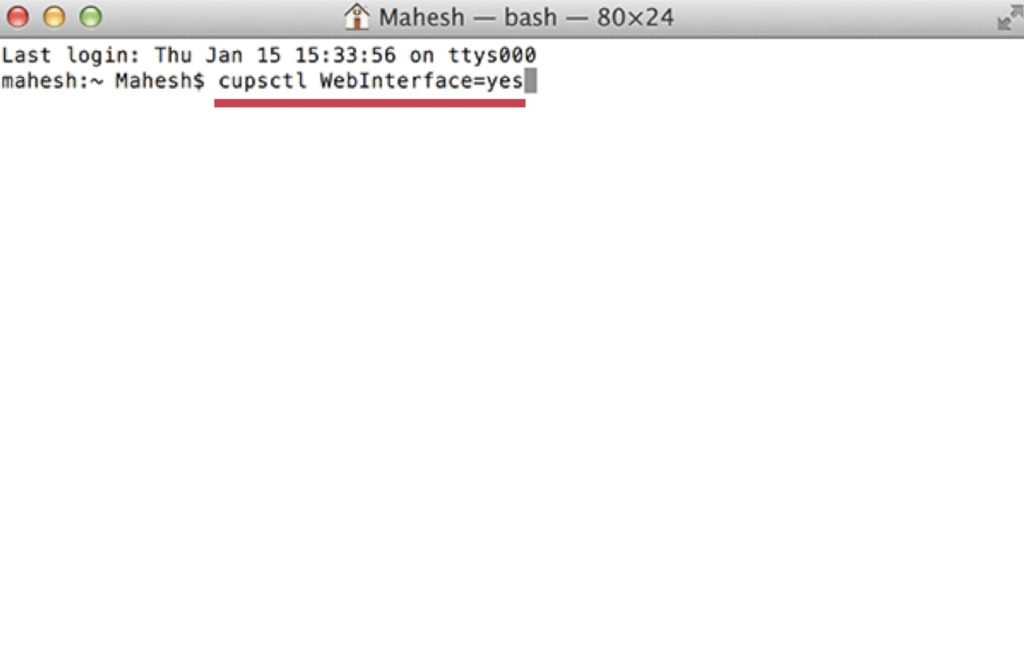
- It will not bring any output to your screen. When that is done, close the app.
So after enabling the web interface, let’s see how you can use it to view your printing history.
Step 2: Enabling the Web Interface
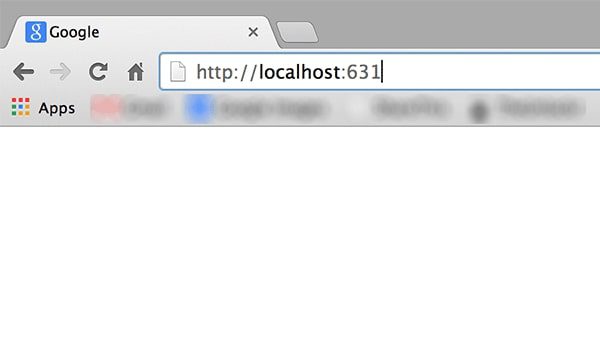
- Open any web browser on your Mac, Google Chrome, for example, and enter the following address into the address bar and press Enter: http://localhost:631. It will open the web interface that you enabled in the above section.
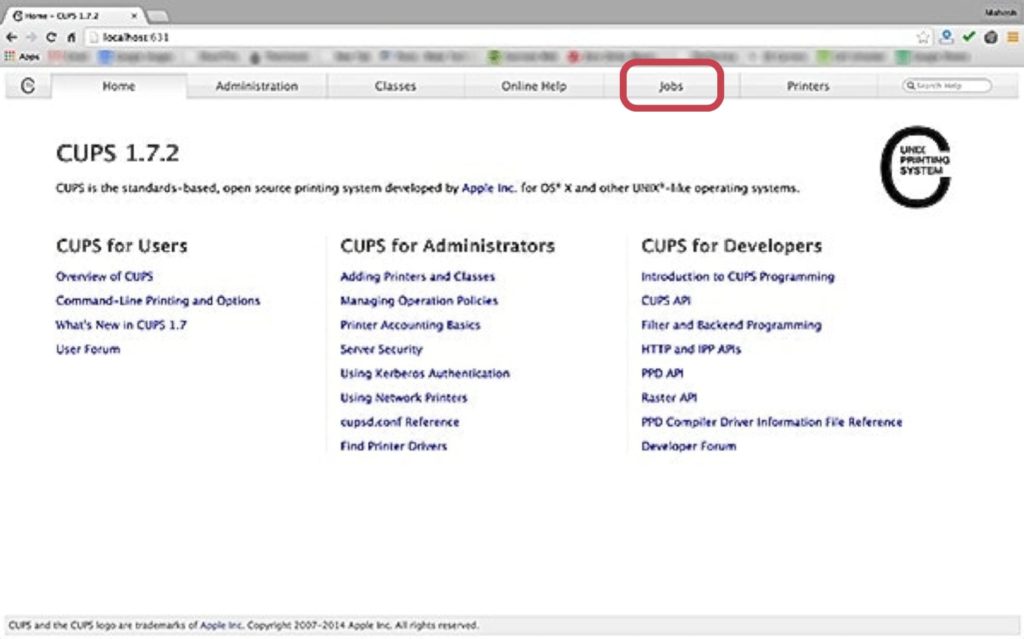
- On the page that opens, click on the Jobs tab. It is one of the tabs located on the top bar. It lets you see your print jobs.
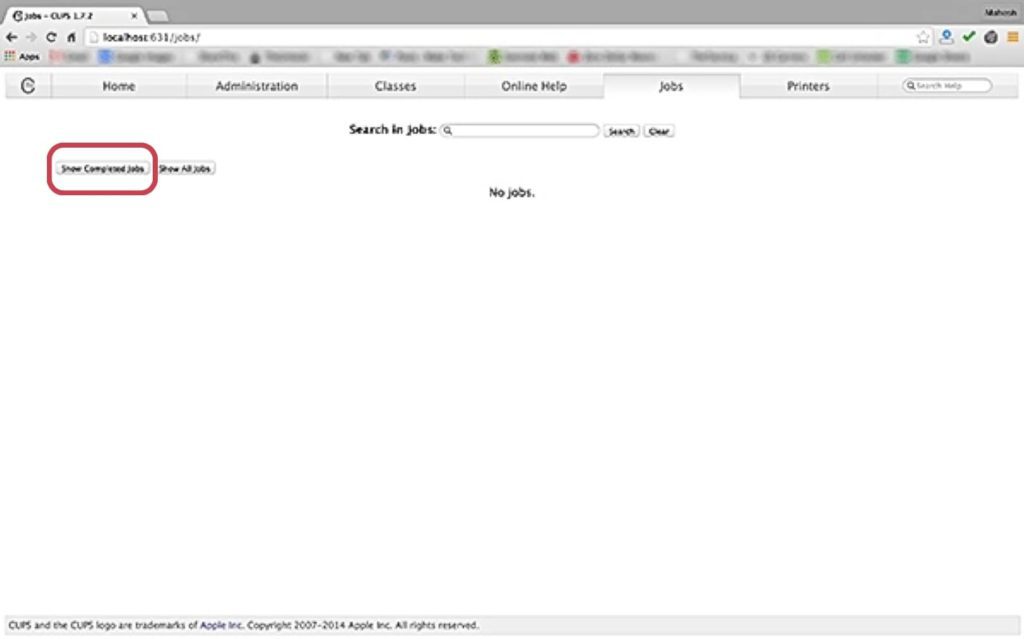
- On the page that follows, you should be able to see a button Show Completed Jobs. Click on it and it will show you all of the completed jobs on your machine.
- Here is where you can see all of the completed print jobs on your machine. There are various columns that provide you with the information for the individual print jobs. It lets you see what printer was used to print the page or pages, size, number of pages that were printed, and completion date and time.
You may also like: How to Rename Apps on Android, iOS, PC (Complete Guide)
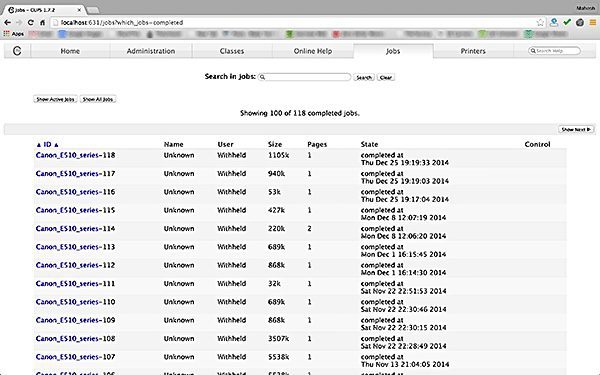
Clicking on the printer’s name should let you see the printings that have been done using that particular printer. It’s very useful as it lets you know what printer is the most used in your office.
Method 2: System Preferences app
If you want to check your printer history on a Mac, use your computer’s Printers & Scanners tool. This tool appears in your Mac’s Dock by default when you add something to your print queue.
If the printer isn’t currently in use, you can locate the same information through the System Preferences app > Printers & Scanners. Select your printer in the left panel and choose Open Print Queue to bring up the status window.
By default, you see only the current printing queue with the status for each print job plus options to pause, resume or cancel a specific job.
However, if you select Window in the printer’s menu bar, you find a Show Completed Jobs option that brings up a window showing a list of your past print jobs along with the status, file name, dates the jobs were sent and completed, and the account name.
Checking Printer History on Windows
When you add a document to print, the Windows print queue window displays with your current print jobs, but you won’t see these jobs anymore after they complete.
You need to update your printing and logging settings so that future print jobs are saved to the history. Windows has different processes to begin saving and viewing the short-term versus long-term print history.
Follow this step-by-step tutorial to easily check your printer history:
Step 1: How To Access Your Print Queue
Viewing your print queue allows you to see the document that you’re about to print. This comes in handy if you think you’ve accidentally sent the wrong file to your print queue.
If you did send the wrong file to your printing list, you will end up wasting time, ink, and paper. The solution? Check your print queue to be 100% certain.
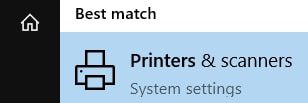
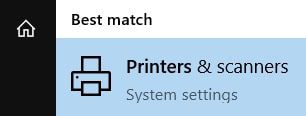
- First, press the Windows button and search for Printers & scanners. Once it shows up, launch this.
- Now find the list of printing devices.
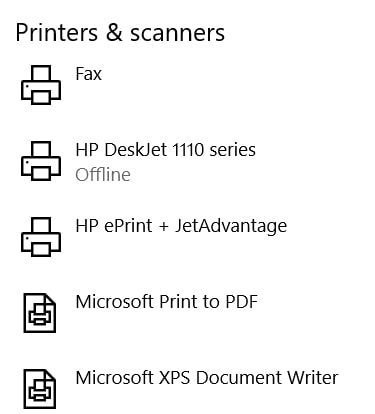
- Then select the name of your printer. Click on it to open a menu just under it. Then choose Open queue.

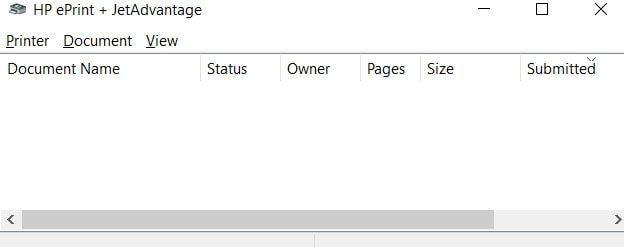
- Once you click Open queue, a window will pop up. There, you will see a list of what’s about to go through your printer. You will also get to view a recent print job.
The print queue provides you with all the information that you need regarding the documents that are and were on your queue. This includes the Document Name, Status, and Size.
Step 2: How To View Your Recent Print History
Even though your printer’s queue lets you view print jobs, it’s limited to recent documents. If you want a complete log of all recently printed documents, you’re out of luck. You can’t count on your printer’s queue for this.
But luckily, there’s a workaround. Instead of going to your printer’s queue, you can turn to the Event Manager.
- First, press the Windows key, search for Run, then launch the app.
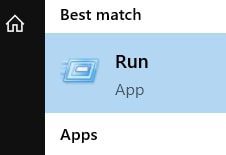
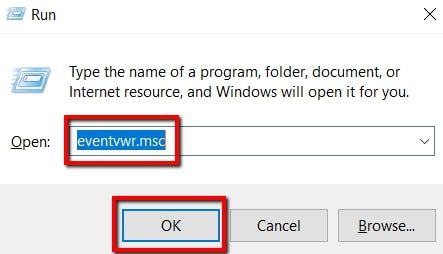
- Type in eventvwr.msc. Then click OK. Doing this will confirm the action and run the task.
This grants access to the Event Viewer. This program allows you (and all the administrators and users of your computer) to access event logs on a remote machine.
You may also like: How to Listen to Radio Without Internet on PC, Android, iOS
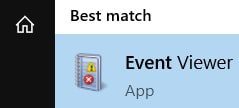
While using Run is easy, there is an alternative. That is to launch Event Viewer directly from the start menu.
- Press the Windows key, search for the program, and press enter.
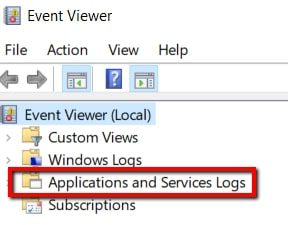
- There, select Applications and Services Logs.
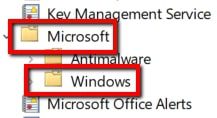
- Next up is to select Microsoft. Then go with Windows.
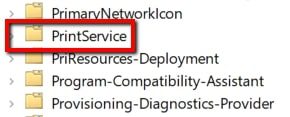
- Once you expand Windows, you will reveal lots of items. Fortunately, this list is alphabetical and therefore makes the hunt easy. So scroll down to ‘P’ and find PrintService. Then select this option.
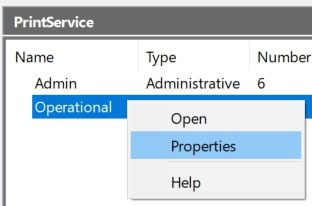
- Choose Operational. Right-click on it and from the selection, go with Properties.
- There, go to the General tab. Look for Enable logging. Beside it is a box that allows relevant information to be recorded.
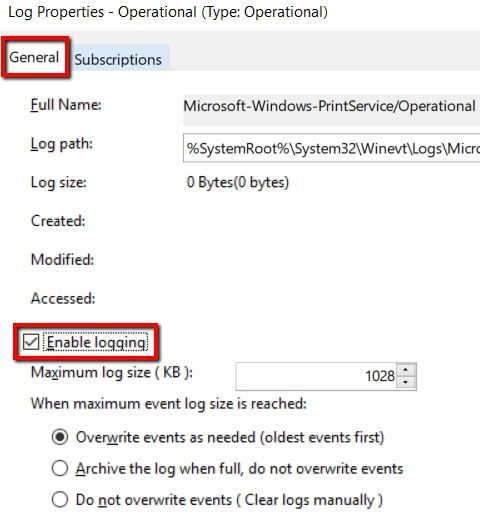
- Once you’re done, click Apply. Then hit OK to save the changes and close the window.

From this point on, you will have a record of future print jobs. Anytime you want, you can view this record.
- To see it in action, simply launch the PrintService folder. Right-click on it and select Open Saved Log.
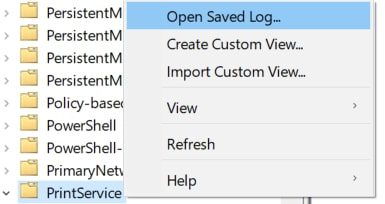
- Once you open this, you will see a list of logs from the moment you enabled logging. Or you can just launch Event Viewer and select Open Saved Log.

Step 3: How To Check Your Printing History
Enabling your system to record future printing jobs is one useful function. But what if you want to look back on what you have already printed since the beginning of time?
If you’re on Windows 10, it’s not going to be a problem. Just follow these simple steps.
- First, hit the Windows button and launch Printers & scanners.
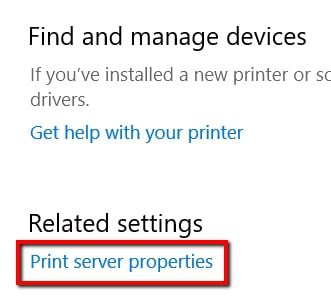
- There, scroll down to the Related settings section. Next, you need to fire up Print server properties.
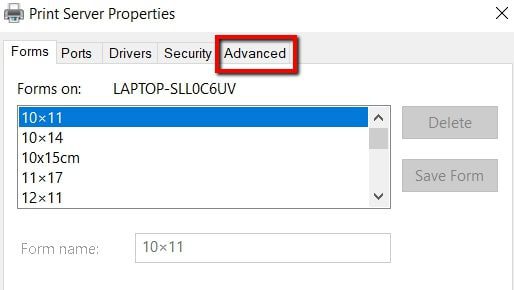
- From there, select the Advanced tab.
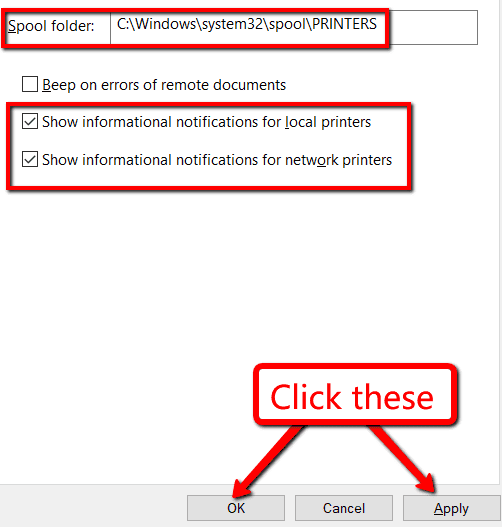
- On this tab, you can check your spool folder. You should also check the boxes that say the following: Show informational notifications for local printers and Show informational notifications for network printers.
- To save the changes, click Apply. Now, select OK.
- To make sure all the changes you applied take effect, restart your computer.
Extra Option: Using Third-Party Tools for Printers
If you want to see your print history on Chrome and use Google Cloud Print, you can access a list of your print jobs on the dashboard on the Google Cloud Print website and remove items as needed.
If you subscribe to HP Instant Ink, you can log in to your account and see your pages printed for the current period along with a print history list to help you monitor your plan’s usage.
Your printer manufacturer may have installed a utility on your computer that – at a minimum – tracks the number of pages printed over time and the remaining ink. If you open this tool, look for an option to view the printer’s usage or status to see this information.
You’ll want to check your manufacturer’s website because the steps can vary. You might also find some basic printer usage information if you select the printer in your operating system’s devices list and locate an about option.


